Traffic to your website comes in many fashions. Probably the most prominent for many bloggers is social media. Our latest website gets 70% of its traffic from social media (Pinterest, Facebook, Instagram, and Twitter). A whopping 55% comes from Pinterest and that number is growing by the week. Many bloggers claim that a stunning 90% of their traffic comes from Pinterest. What I love most about this traffic is the price – it’s free. I’ll share with you how making Pinterest friendly blog posts helped grow this traffic referral source steadily over the last 3 months.
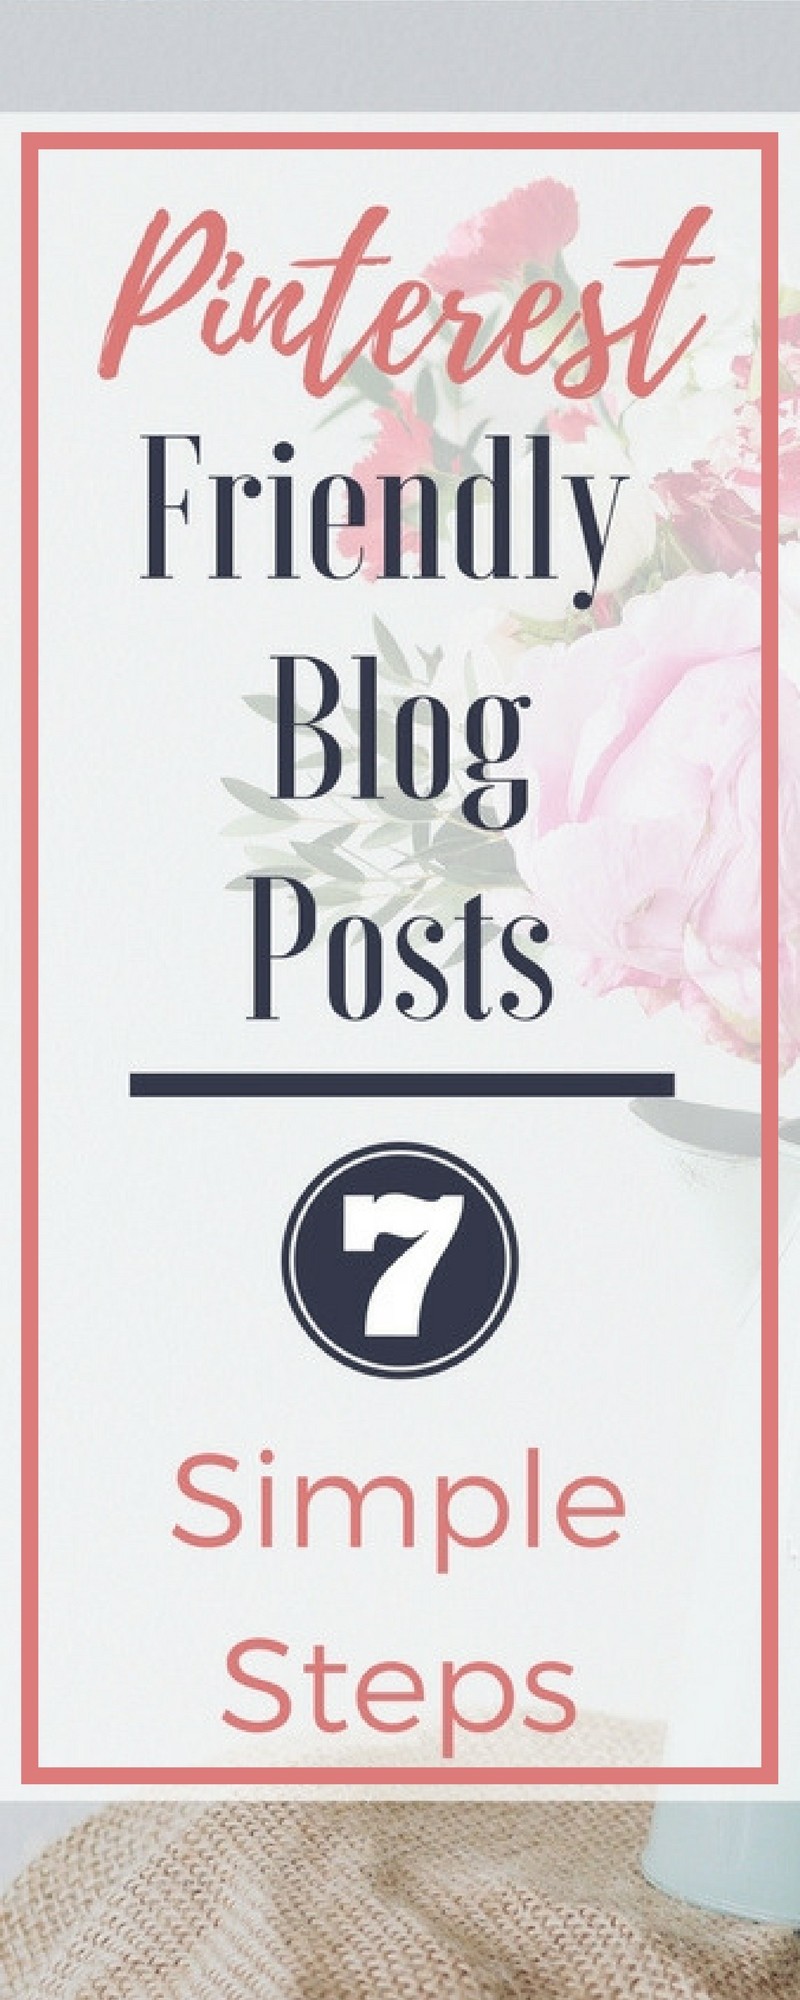
Pinnable Feature Image
A recent change we’ve made to our posts is to include a pinnable feature image (or first image they see) for each post. What’s Pinterest friendly? Tall and vertical. Check out the image header for this post. Make it easy for your users that want to hit the share button on your social media to pin your blog post. A strong tall and vertical image at the beginning of your post will accomplish this task.
Install a Pin It Button
Make it easy for your users to pin not only your feature image but ANY image in your post. You can accomplish this task by installing a Pin It button. The Pin It button can be found by visiting the Pinterest Developers page. Select “tools” from the menu. The default screen is the “widget builder” screen.
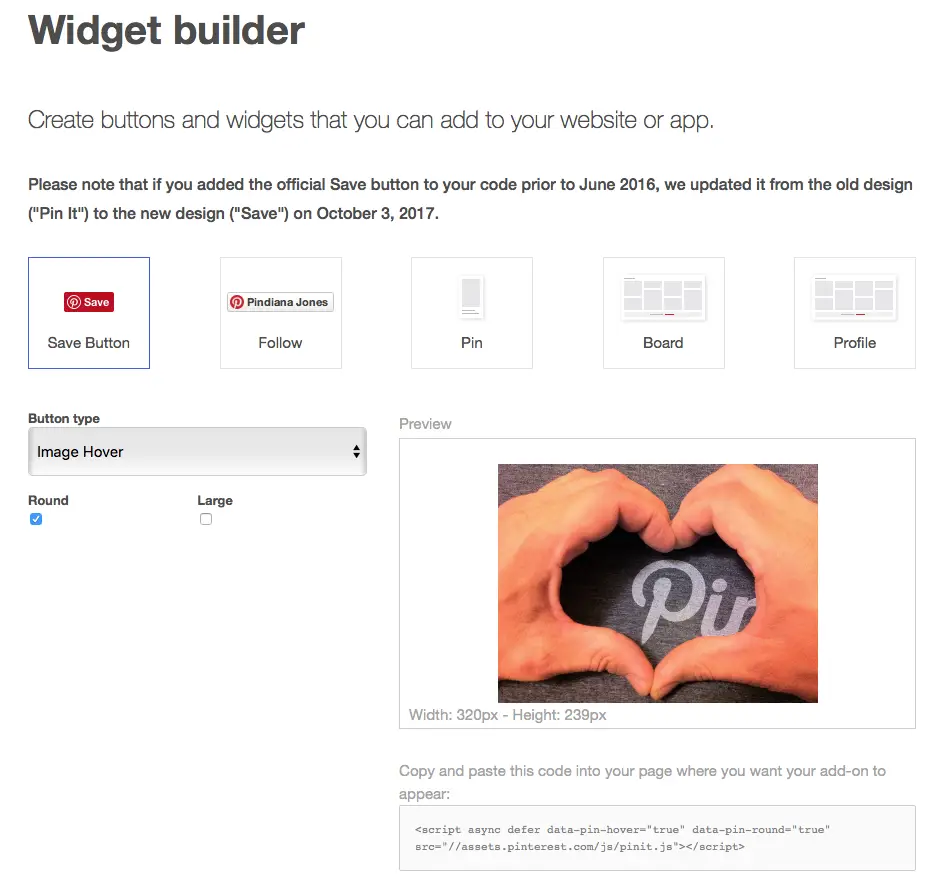
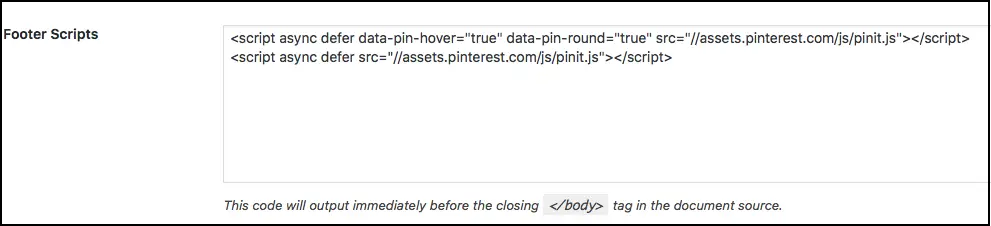
You can select the same settings from my image above and you’ll get a nice round Pinterest button that hovers over each image in your blog post. Next, you’ll need to copy and paste the code that’s generated into your theme. Go to your theme settings and paste the code into the footer section if you want it to appear on all pages and posts (that’s what I do). Otherwise, you’ll need to manually paste the code on every post and page. Important note. You’ll notice two pieces of code in the image below. I’ll discuss the second line of code later in this post.
Hide a Pin in Your Post
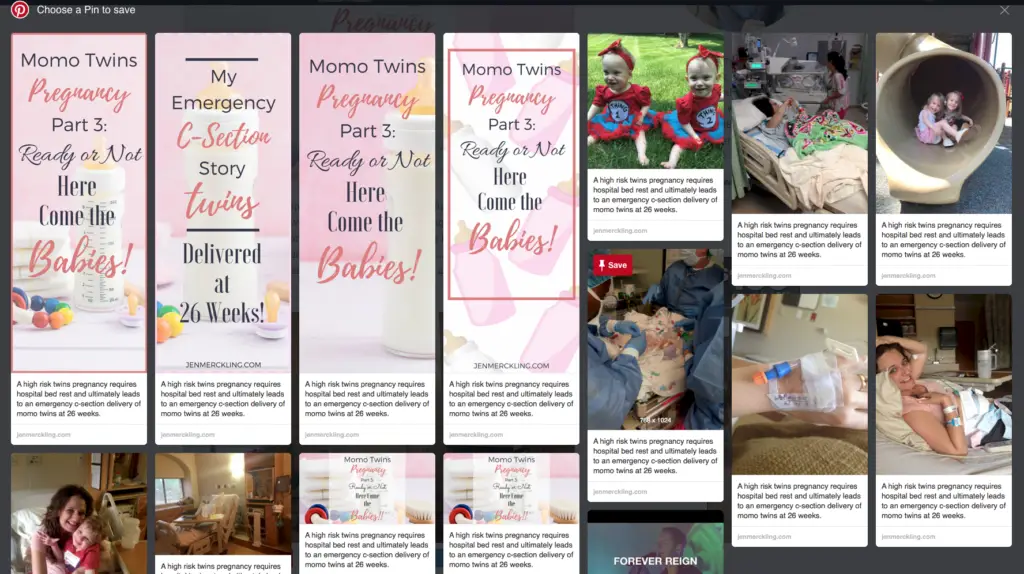
Here’s one of my favorite tricks. You may see some bloggers actually use their pin as the feature image for their post. This is absolutely a fine best practice. An alternative to this strategy is to hide your pin(s) in the post. When a visitor hits the Pinterest social share button on your post, a pop-up screen will show all the images from your post. Pins that you’ve hidden will also show up on this pop-up screen. In the image below, the first four images are hidden in the post. You won’t find them anywhere in the post.
How do you do this? Go into your post editor. In WordPress you’ll need to switch from “Visual” to “Text” editing. Next, enter the following code at the very bottom of your post:
<div style =“display:none;”>INSERT YOUR IMAGE TAG HERE</div>
Here’s the actual code used for my hidden pin on this post:
<div style=”display: none;”><img class=”alignnone wp-image-2456 size-full” src=”https://jenmerckling.com/wp-content/uploads/2017/12/Pinterest-Friendly-Blog-Posts-Pin.jpg” alt=”How to make Pinterest friendly blog posts. Try these 7 simple steps to increase Pinterest referral traffic to your website.” width=”800″ height=”2000″ /></div>
Switch back to the visual editor and make sure the pin is hidden. That’s it. You’ve done it!
Enable Rich Pins
Rich pins are a must. Be enabling rich pins on your website you increase the credibility and professionalism of your content. What are rich pins? In a nutshell, they add extra data to your pin automatically. They also update in real-time when certain information changes. Check out this article from Pinterest on the 4 types of rich pins. In terms of blog articles, rich pins automatically adds a headline, author, and description (taken from your metadata).

Add Social Warfare Floating Buttons
Social Warfare is my favorite plugin for social sharing. The plugin is easy to use, flexible, and customizable. The floating buttons on the screen are the best part. I love the idea that social sharing buttons are floating down the screen as the reader moves through the post. They don’t have to wait until the end to share. Make it easy for your readers to share!
Add Alt Text to Your Images
Not only is the addition of alt text a good SEO best practice, you’ll also want to add alt text for your pins searchability within the Pinterest search engine. You can do this in the media manager if you’re using WordPress. There’s an alt text area for all of your images. Don’t leave this blank. Everything you enter here will travel with your images if a visitor pins them.
What should go in the alt text? Keywords my friends, keywords! What I like to do is going to Pinterest and use their search engine to fine tune my keywords. Start typing in a potential keyword. Watch how Pinterest starts adding more words onto your term (just like Google’s search engine). Hit enter and then take a look at the list of words that show up below the search bar. The first five words are great options to consider for keywords to include in your image alt text.
Add a Pinterest Board or Profile
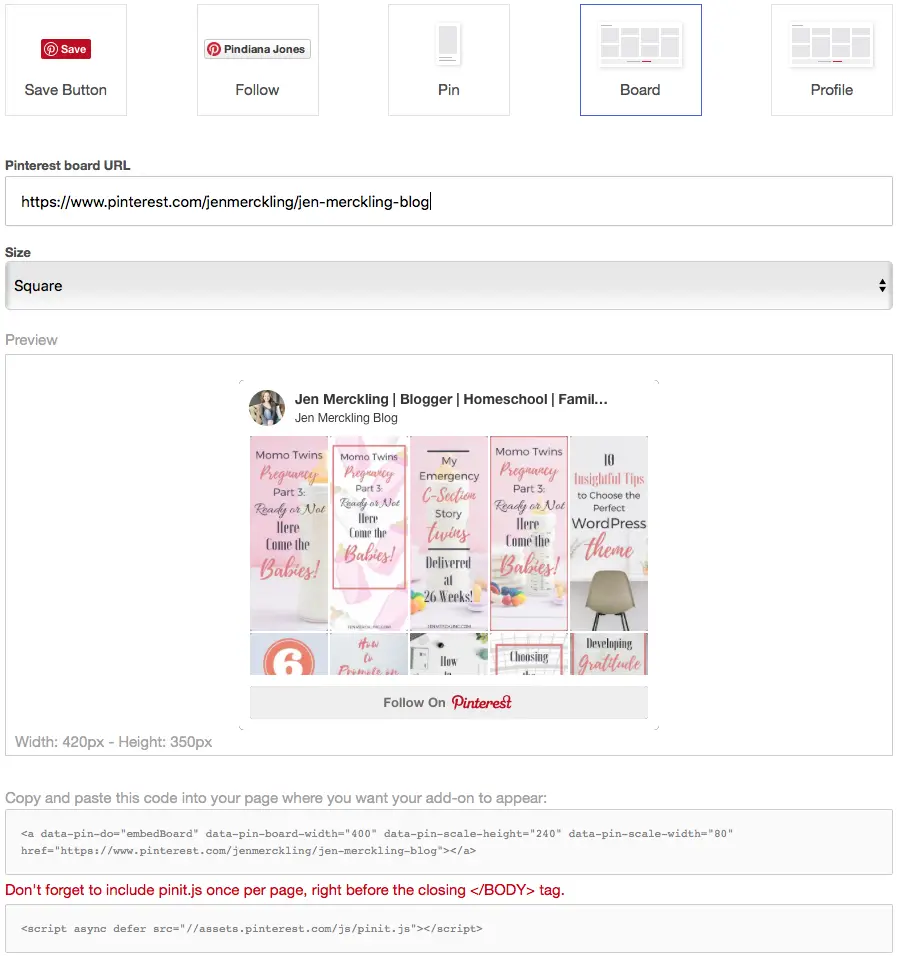
Back in the Pinterest Developer tools screen you can select the widget builder option again. Here you can make a couple pretty slick tools to embed on your site. You can either place a scaled down version for one of your own Pinterest boards or alternatively your Pinterest profile. I like to go the “board” route and make a widget for the board that contains all of our blog post pins.
You can then place this widget within a blog post, in your sidebar, as a header or a multitude of other ways. My preference is to put the board in the sidebar so it shows up on every post. You can accomplish this by placing the code that’s generated (see bottom of image) into a text widget. You do have one extra step with this widget though. You’ll also need to place a second snippet of code (see image below) into the footer section of your page or theme.
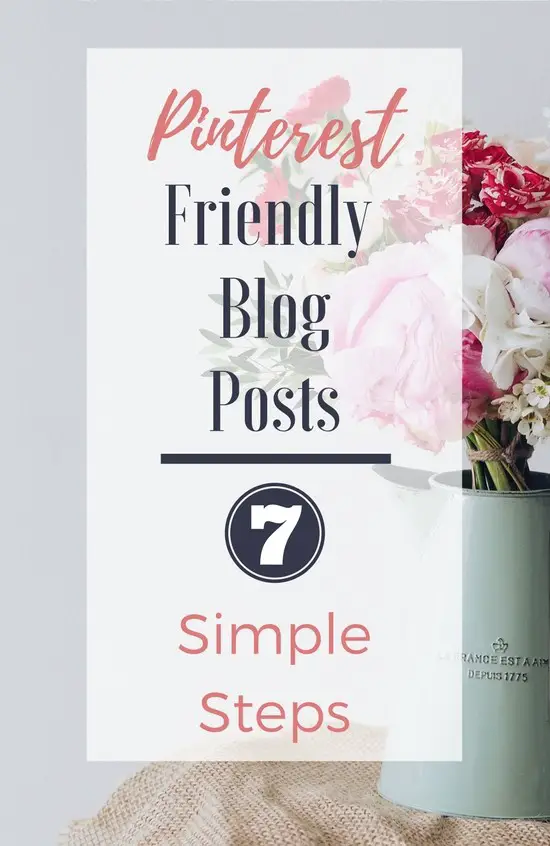
Give Pinterest Friendly Blog Posts a Try!
I hope these tips help you make your path to Pinterest friendly blog posts a simple process. Our current site has grown from 5,000 monthly Pinterest pageviews to 300,000 monthly pageviews in the first 3 months! Our daily referral traffic (clicks to our website) average around 100 clicks per day in just our 3rd month. I’m excited about the steps we’ve taken and I hope you can benefit from them as well.
Please reach out with questions, comments, or advice. I’m eager to keep learning myself and share the best blogging practices from readers like you!
Happy Blogging!
Jason